
If you’re an affiliate blogger, tracking can feel like trying to count fish in a river with fog rolling in. Some days GA4 looks “off,” link clicks don’t line up with affiliate dashboards, and the numbers get worse the moment you add a cookie banner.
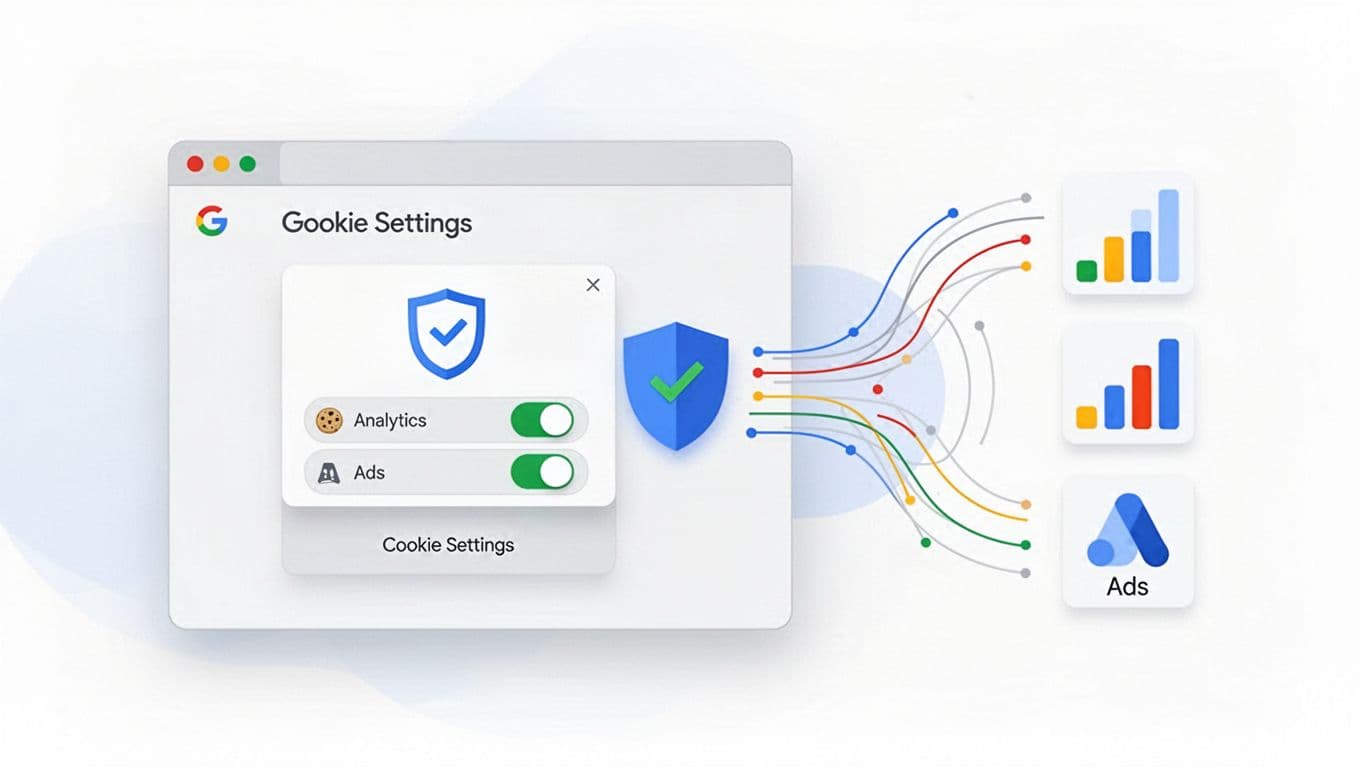
That’s where Consent Mode v2 comes in. It doesn’t “fix” privacy laws, but it gives Google tags clear instructions about what they’re allowed to do when a visitor says yes, no, or “only necessary.”
This guide is a practical 2026 setup checklist for GA4 + Google Tag Manager (GTM), written for non-lawyers who still want clean data amid data privacy requirements and fewer surprises.
What Consent Mode v2 changes for GA4, ads, and affiliate sites (2026 reality)
Consent mode v2 is basically a set of “traffic lights” for Google tags. On every page load, your site should send Google four consent states. Two are older, two are newer in v2:
| Consent signal | What it controls (plain English) |
|---|---|
analytics_storage | Analytics cookies and identifiers (GA4 storage) |
ad_storage | Ads cookies and identifiers |
ad_user_data | Whether user data can be used for ads measurement |
ad_personalization | Whether ads can be personalized (remarketing) |
In the European Economic Area and UK, this matters a lot because GDPR compliance and the Digital Markets Act make “silent tracking” where sites get into trouble. The common 2026 pattern is: default to denied, then update after the visitor chooses. You’ll see this approach explained in industry summaries like Consent Mode v2 explained for 2026 and comparisons of how Basic Consent Mode vs Advanced Consent Mode behavior affects GA4 data loss like this basic vs advanced Consent Mode guide.
For affiliate bloggers, here’s the practical impact:
- If someone declines, you may still get limited cookieless pings and conversion modeling for Google products (depending on your setup and mode), but you should expect gaps.
- Your affiliate network tracking is separate from GA4. Cookie limits and consent can reduce attribution, which is why it helps to understand how affiliate cookie windows affect earnings.
- If you run Google Ads (even lightly), consent mode v2 is often the difference between “some conversion visibility” and “almost nothing” for EEA traffic.
Quick decision tree: do you need Consent Mode v2, and should you use a Consent Management Platform?
Use this short decision tree to decide your next move:
- If you have visitors from the EEA or UK (even 10 percent), go to step 2. If not, consent mode v2 is still a good idea, but not always urgent.
- If you use GA4, Google Ads, or Google Marketing Platform tags, go to step 3. If you don’t use Google tags, consent mode v2 may not apply.
- If you run Google Ads, remarketing, or enhanced conversions, consent mode v2 is strongly recommended, and in many cases required for full feature support in regulated regions.
- Choose a Consent Management Platform when you need a real consent banner with logging, geo rules, and preference management. If you want the simplest path, pick a Google-certified Consent Management Platform that supports IAB TCF (common in the EU). If you run server-side tagging, also check CMP compatibility with server containers (this overview is helpful: Consent Mode v2 for server-side tracking).
GTM implementation sequence (what to build first, and how it should fire)
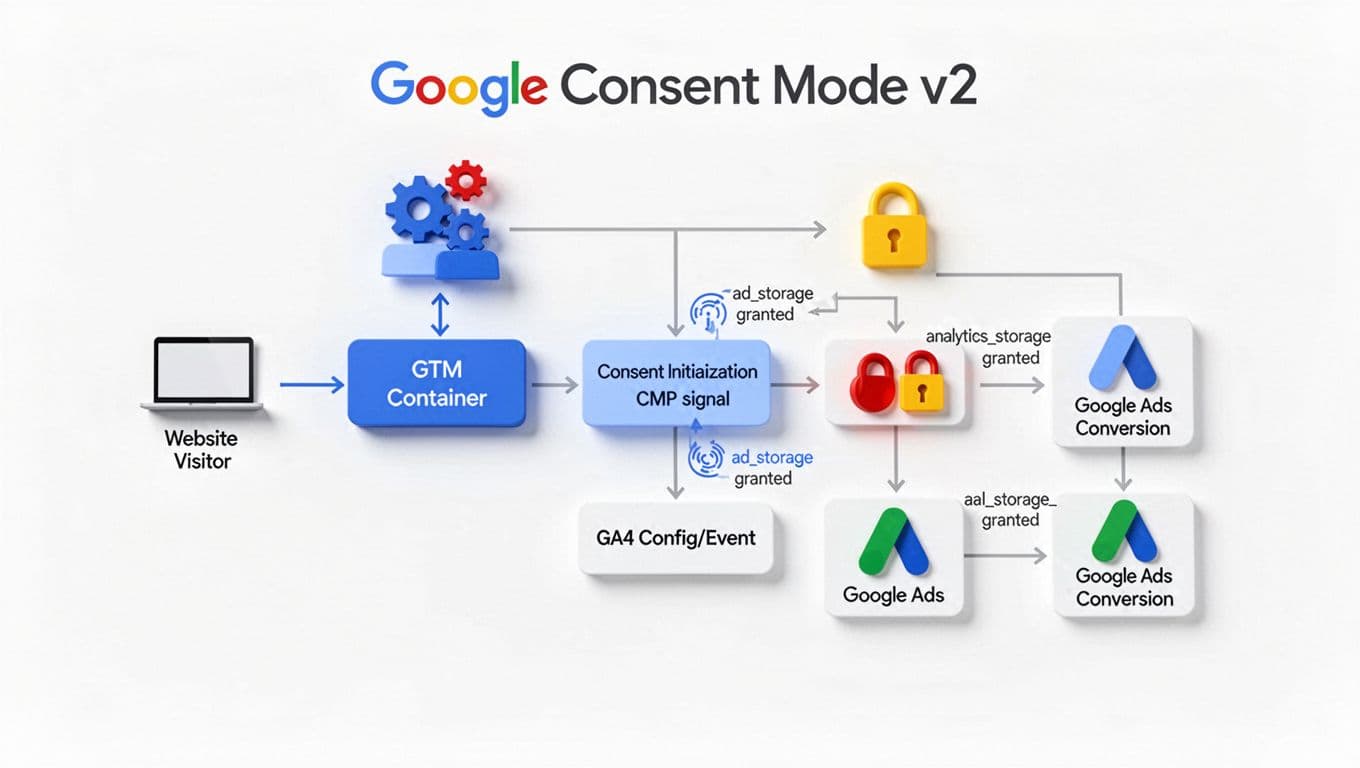
The biggest mistake is getting the order wrong. Consent signals must be set before your GA4 tag decides what it’s allowed to do.
Here’s a clean 2026 sequence that works for most affiliate blogs:
- Audit your current tagging Remove duplicate installs (for example, GA4 hard-coded plus GA4 in GTM). Keep one source of truth, usually GTM.
- Create Tag #1: “Consent Default (v2)”
- Tag type: Custom HTML (or a Consent Mode tag/template if you use one)
- Trigger: Consent Initialization trigger
- Goal: Set the default consent state to
deniedfor all four consent signals on page load (until the visitor chooses)
- Create Tag #2: “Consent Update (v2)”
- Tag type: Custom HTML
- Trigger: A consent event you control (example:
consent_update) fired after the visitor clicks Accept/Reject, or when a saved choice is detected on return visits - Goal: Update consent state to
grantedor keep denied based on their choices
- Configure your GA4 Configuration tag
- Trigger: All Pages
- Consent settings in Google Tag Manager: For “Advanced Consent Mode” behavior, don’t add extra consent requirements that block the tag. Let GA4 run under denied states (it should avoid cookies for cookieless operation), then switch to full measurement when consent is granted.
- Configure GA4 events you rely on (affiliate click tracking) Track outbound affiliate clicks as events, vital for conversion tracking. If you’re building money pages, this pairs well with a solid product review post structure so you can compare what gets clicks versus what earns.
- Optional: Google Ads tags If you run Ads or use server-side tracking, keep the same pattern: consent defaults first, update after choice, then Ads tags behave based on the states.
If you want a second reference point for the same flow, this Consent Mode v2 setup guide document is a useful checklist-style read.
Copy/paste consent defaults and update logic (CMP-agnostic)
You don’t need proprietary CMP code to understand the gtag.js implementation logic. You need two moments: a default on page load, then an update after choice.
Copy/paste: Consent default (Tag #1, Consent Initialization)
gtag('consent', 'default', {
ad_storage: 'denied',
analytics_storage: 'denied',
ad_user_data: 'denied',
ad_personalization: 'denied'
});
This sets the initial consent states for ad_storage, analytics_storage, ad_user_data, and ad_personalization to denied. Users can also configure url_passthrough or ads_data_redaction for more privacy-focused setups.
Copy/paste: Consent update (Tag #2, fires on your consent event)
In GTM, you can map a “user choice” into granted/denied values. Example mapping (use a Custom JavaScript Variable, or two simple variables like {{consent_analytics}} and {{consent_ads}}):
- If visitor accepts analytics, set
analytics_storagetogranted, elsedenied - If visitor accepts ads, set
ad_storage,ad_user_data,ad_personalizationtogranted, elsedenied
gtag('consent', 'update', {
analytics_storage: {{consent_analytics}},
ad_storage: {{consent_ads}},
ad_user_data: {{consent_ads}},
ad_personalization: {{consent_ads}}
});
If your banner has separate toggles (ads yes, analytics no), this structure handles it cleanly.
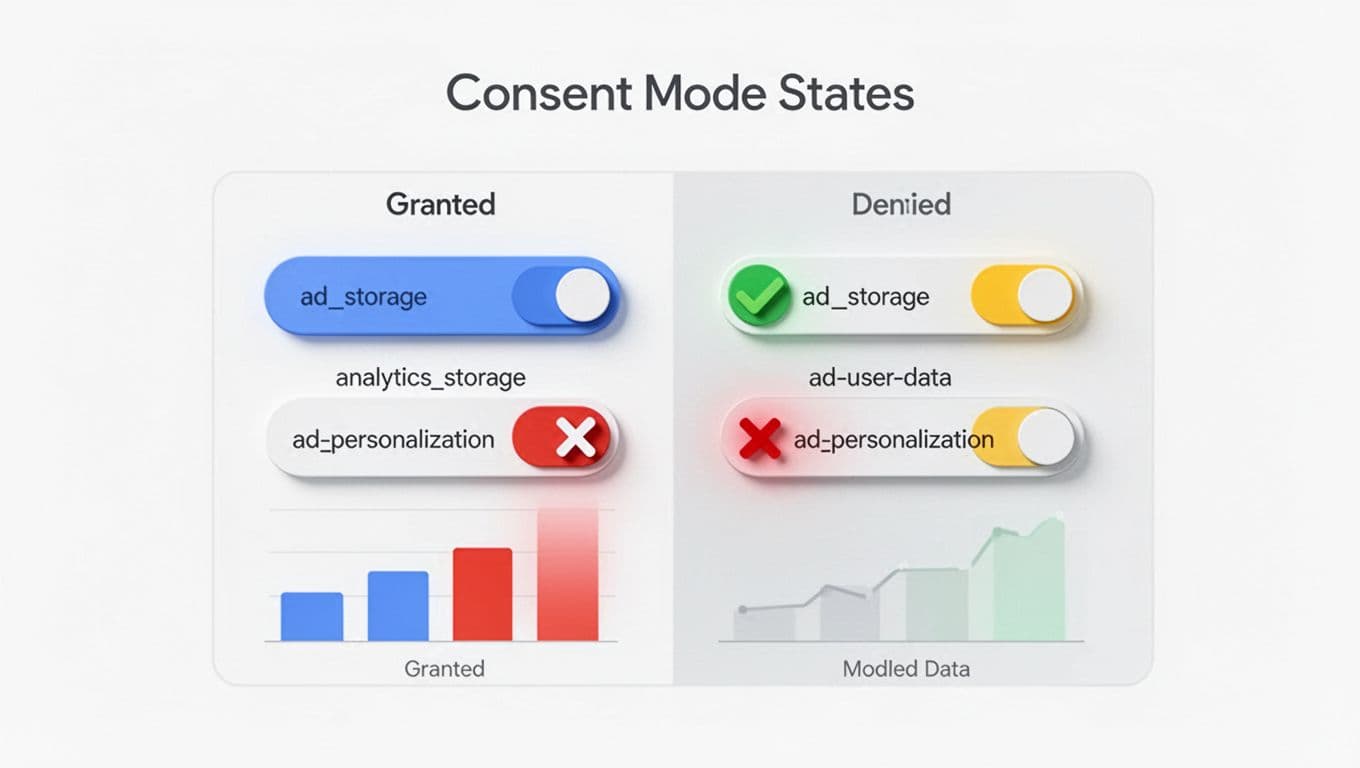
QA checklist: what to see in Tag Assistant and GA4 (granted vs denied)
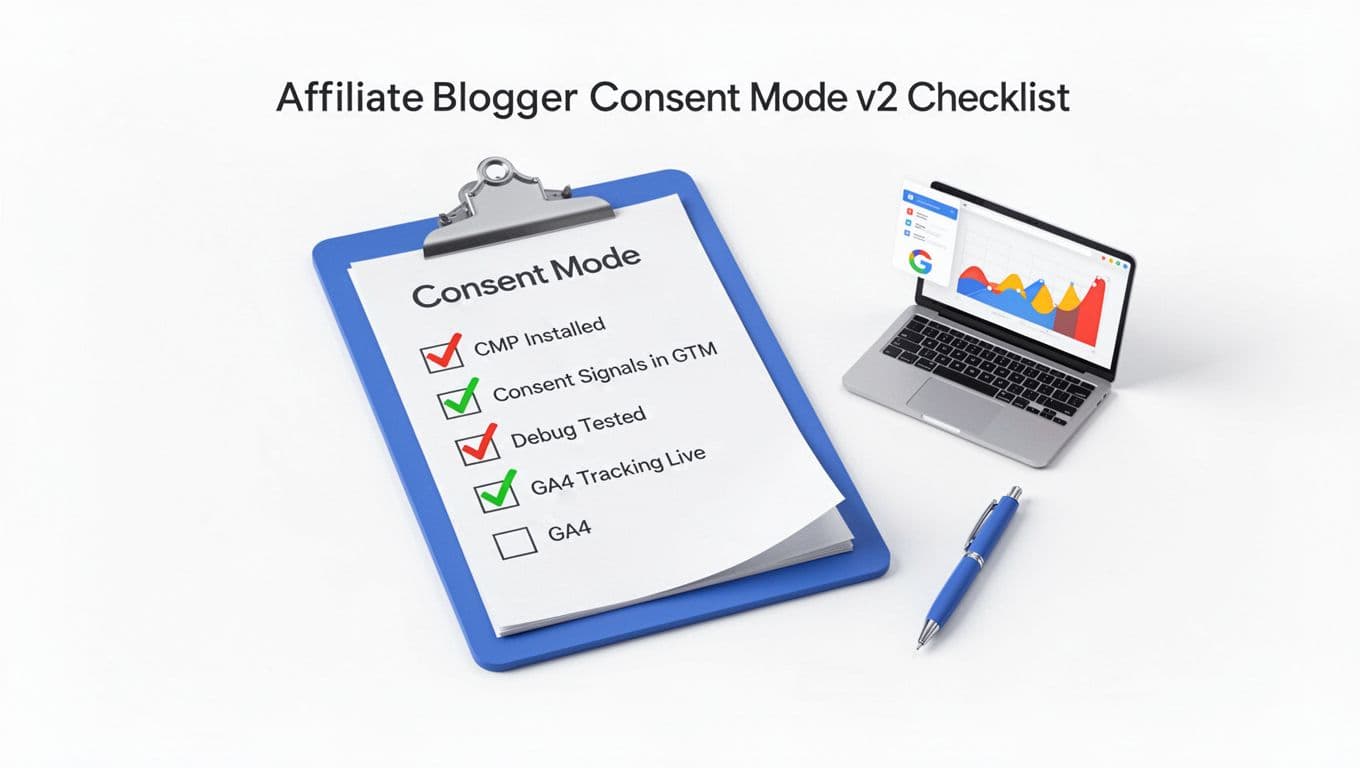
Treat QA like locking your front door. It’s boring until you skip it once.
Expected outcomes in Tag Assistant
- On first page load (before any click)
In Tag Assistant, open the Consent view. You should see all four states set to the default consent state of denied, coming from your Consent Initialization tag. - After clicking “Accept” (or enabling toggles)
You should see a consent update event, and the states should flip to granted (the update consent state) based on the toggles you allowed. - Tag firing behavior
- Your Consent Default fires first.
- Your GA4 Config tag fires on page view (with behavior controlled by consent state).
- Your Consent Update fires after the banner choice (not before).
Expected outcomes in GA4
- When consent is granted: With Consent Mode v2, you should see normal Real-time activity, debug events (if using DebugView), and the collection of first-party data with browser identifiers and cookies behaving normally.
- When consent is denied: Expect thinner reporting. GA4 may still receive limited signals (depending on your exact implementation and region), but you should not see the same user-level continuity.
One more thing: if your affiliate earnings rely on clean attribution, don’t ignore partner rules and tracking limits. Use a repeatable affiliate program vetting checklist as part of your overall conversion tracking strategy so you know what each program supports (sub-IDs, attribution model, locking periods) before you blame GA4.
Conclusion
Consent banners don’t have to turn your analytics into a ghost town. With Consent Mode v2, the main win is order and clarity for maintaining data privacy while keeping GA4 and Google Tag Manager working efficiently: set defaults early, update fast, and confirm the states in GTM Preview before you trust the numbers.
If you set this up once with a Consent Management Platform and document it, you’ll spend less time guessing and more time improving content that actually earns.